Sunday, May 17, 2009

Matchbox and Chocolate!


This was a fun project! I used the Matchbox die that is available in the Occasions Mini Catalog. I used a Chocolate Chip card stock base with To the Nines Specialty DSP for the cover.
I stamped Avery labels with the paisley stamp from the Wanted set in Chocolate Chip and Mellow Moss Classic Ink, and then wrapped the label around a Hershey nugget. 4 nuggets fit nicely in the Matchbox.
The Just for You sentiment is from the Only Oval set, also available in the Occasions Mini. I stamped it twice on Sahara Sand card stock in Chocolate Chip Classic ink. I then punched one image out with the Large Oval punch, and the other image was punched using the new Scallop Oval punch. I layered the Large oval on top of the Scallop Oval using 2 dimensionals. This created a place to slide the Chocolate Chip ribbon through the tag, so the ribbon could be wrapped around the Matchbox.
You have until June 30th to take advantage of the Occasions Mini!

Friday, May 15, 2009

Hannah at 31 weeks!

Here is baby Hannah at 31 weeks! That would be her foot pressed up against her face!
She was practicing her yoga poses. In another pose she had the back of her hand up against her forehead - think Southern Belle! She has my nose and little indentation above her top lip.
Here she is actually smiling!

The measurements taken support my theory that she will be here before the 17th! She is estimated to be 4 lbs 4 oz - which is about a pound bigger than where she should be at 31 weeks. Her overall body measurement is showing a gestational age of 34 weeks!

I guess time will tell!


Thursday, May 14, 2009

Thoughts & Prayers

Here is a card we made at our Hostess Club. We used Kraft card stock for the base. The card stock was cut from 8-1/2 x 11, but cut length wise rather than by the width. Yes, it still fits in a regular size envelope - it just opens from right to left rather than top to bottom!
Paper: Kraft card stock, Urban Oasis DSP, Chocolate Chip card stock, Close to Cocoa card stock, Very Vanilla card stock
Ink: Close to Cocoa Classic ink
Accessories: Chocolate Chip 1/4" Grosgrain Ribbon, Antique Brass brad

Wednesday, May 13, 2009

Sunshine Garden Challenge

Each Hostess Club, I give my members a challenge piece. They received a piece of the Sunshine Garden Simply Scrappin' Kit, and a sheet of the die cuts to go with it. This page is what I came up with.
I cut the strip of flowers from the 12x12 page and added it to a piece of Baja Breeze card stock. I cut the strip of stripes from the same page and adhered them to pieces of Kiwi Kiss card stock. I really like these colors, and am going to miss them when they retire this summer!

Tuesday, May 12, 2009

Daisy Baby

A quick progressive page made during our Hostess Club using In-Colors, and the Daisy #2 Big Shot Die, and the polka dot texture plate! We added a bit of Dazzling Diamonds to the centers of the flowers using 2-way glue. And yes, that is me at 3 months old! :)
Colors: Pink Pirouette, Riding Hood Red, Basic Black, Whisper White.

Monday, May 4, 2009

2 year old rock star

This is my oldest son taken when he was 2. He's now almost 11! I so can't believe how time flies. I also can't believe that I am just now getting around to scrapbooking this photo! Yikes!!
I used the Rockabilly Designer Series Paper for this layout. Be sure to check out the current sale going on to see how you can get FREE paper!
I also used Sticky Cuts letters and glitter for the "rock" on the page. The stars were cut from Basic Black card stock using the large star punch. I did my journaling (which I am really bad about doing on my layouts) on a piece of Whisper White card stock that I punched using the round tab punch.

Friday, May 1, 2009

Hannah's Bedding!

I forgot to update you on my quest to find baby bedding!! Well, we found it. I should say... we bought it. We had seen this bedding before, but put something else on our registry. Then we went to a different baby furniture store and saw it again. We loved the way it was presented. So we went back to the store we registered at and bought it. We knew that if we didn't buy it then, that they would discontinue it or we would never find it again. :) We bought the mobile too, and added all the little accessories to our registry.


It' has super cute butterflies on it! I'm sure I'll have to cut the extra wings off once it goes through the wash... but still so cute!

And here is what the whole collection looks like. Not that Hannah's room will ever look THAT put together - but it's nice to dream!


We also bought the paint for her room. It is Pale Plum! I can't wait to see it on the walls. Sure hope the tech was right, and it is for sure a girl!! Hee hee.

We go back for our 3rd trimester ultrasound on May 15! I can't wait to see her little face!

Thursday, April 30, 2009

A Note of Thanks


Today is the last day that you can get this note set for FREE! There are actually 2 note kits, and 8 single stamps to chose from. You can see them on page 208 of your catalog. All you have to do is place a $40 order from the Occasions Mini Catalog. You can place your order right now on my website. www.andreamason.stampinup.net
Back to the card. This set is great for all levels of stampers. You can use the kit by its self, or dress up your card with as many embellishments as you'd like. It includes a Note of Thanks die-cut stamp, 4 Whisper White gift cards, 4 envelopes, and a Chocolate Chip Classic Stampin' Spot. After today, you can order this set for $10. Which is still a great deal!

I used the Stampin' Up! Scalloped Edge punch on the bottom of the card. I then added a 1/4" grosgrain ribbon in Chocolate Chip to my card to finish it off.
Super fast, super easy!


Monday, April 13, 2009

Fe, Fi, Faux Fun!

Stampin' Up! Faux Frosting!
I had so much fun making this faux frosting for my cupcake! There is a product available called Liquid Applique that gives this puffy look to whatever you put it on. Fun flock is out there too. But I wanted to figure out how to do it using Stampin' Up! products. So after a little playing... I did it! So fun!
Begin by stamping your image onto your cardstock. I used Basic Black ink on More Mustard card stock.


Then I applied Crystal Effects to the frosting area of the cupcake!


Then I poured White Embossing Powder on top of the Crystal Effects.
It will look like this when you gently shake off the excess powder. Be sure to wipe away any stray powder that may be left on your card stock.

Now, grab your heat gun and give it a go! You can apply heat from the top or the bottom. So fun to see the "frosting" start to bubble! Careful not to cook your frosting too much.


Ta da!

So now I'm sure you are wanting to know what other embossing powder colors you can do this with! I tried clear embossing powder on my duck. Here's how she came out...

Not as fluffy as the white embossing powder, but it does give the duck a little texture and the illusion of feathers.
Alrighty! Go give it a try, and let me know what you come up with!


Tuesday, April 7, 2009

Hoppy Memories

A few pages that I made using my Simply Scrappin' Hoppy Memories Kit.
Now... to just add the pictures, and get them in an album!


I LOVE LOVE LOVE Stampin' Up!'s Simply Scrappin' Kits. They make it so easy to put pages together. Now, finding the time to sit and do them is another story. I had this grand goal at the start of the year to work on my scrapbook albums a little each month. So far... these 4 pages are all that I've accomplished! I NEVER thought I would say this... but I am so looking forward to see the digital scrapbooking suite that Stampin' Up! is coming out with!
I have come to realize that I am a goal setter... not so much a goal achiever. I just can't believe how quickly the time gets away. Our "to do" list for the house has been reduced so I can say we are making progress, it just doesn't feel like it. My goals this weekend are to go to on the hunt for baby bedding so that I can pick a paint color for the nursery, and get to Michaels for some photo storage boxes. Mind you I have agent convention the rest of the week, a baseball game Friday night, 2 more games Saturday morning, Easter on Sunday that I still need to prepare materials for my 1st grade class, and a ton of laundry to get through. I'll let you know how far I got next week! What are your goals for this weekend?


Monday, April 6, 2009

Manhattan Flower Card

This is a card we made at our last Hostess Club using the Manhattan Flower Embossing Folder. I love how super simple, yet elegant this folder is. I sure hope we get more in the next catalog!!
We used Basic Gray cardstock with a Basic Gray Taffeta ribbon. To get the flowers to be a little more pronounced, we lightly sanded them with a sanding block. Stampin' Up!s cardstock don't have a white core, but the gentle sanding of the roses gave them just enough pop and a soft feel that it didn't need anything else!
Here is a closer look at the sanded flowers.
I actually used this card too! I gave it to my husband on Friday with his anniversary present. He was quite impressed (with the card and the present). We celebrated 11 years of marriage! Fun times!!

Wednesday, March 4, 2009

Yummy for your tummy!

This is the 3rd post today! I've been bad about keeping up with the blog. We've been busy doing house stuff, sports with the boys, and baby stuff that I haven't had much of a chance to craft.
Again, sorry for the bad photo. I just couldn't get this box to pose!
I will try again later in the sunlight and see if I can get it to cooperate.

Here is a cute box made out of Riding Hood Red card stock (#111348). I made the box using my Big Shot! The die is called Box #2 (#114518) and can be found on page 194 of your catalog. This is so easy to assemble! It really only takes one piece of adhesive! I used the Yummy set for the sentiment. You can get the Yummy set for FREE when you spend $50 during Sale-A-Bration. But hurry, SAB ends March 31! I used the Designer Label punch (#107590), and a piece of Styled Vanilla Hodgepodge Hardware (#112454) to attach the sentiment to the box. The ribbon is the beautiful Riding Hood Red Taffeta Ribbon (#111365).
We will be making this box at our March 9th Hostess meeting!

A note of thanks!

We have started to receive some gifts to welcome our baby girl. I am determined to stay on top of my thank you notes! So, I sat down last night and made a few.

I used the Stampin' Up! Whisper White Note Cards (#107311) for my base. I love the size of these! I chose Raspberry Tart (#113975) as my Designer Series Paper. I then added a strip of Whisper White Taffeta Ribbon (#109070) across the front and around the back of the DSP. I stamped the Thank You using the Elegant Thank You (#114484) from page 208 of the current catalog in Old Olive Classic Ink (#102277) on Pink Pirouette card stock (#111351). I then used my Scallop Square (#112081) to punch the thank you out. Dimensionals (#104430) were used to pop the punch up a little.

This one uses the Raspberry Tart DSP, Pink Pirouette, White Taffeta ribbon, and Rose Red Classic Ink (#101778). Sorry the picture is a bit crooked here!

And this one again uses the Raspberry Tart DSP, Pink Pirouette card stock, Rose Red Classic Ink, but I used the beautiful Whisper White Organza Ribbon (#114319). I love the extra detail that the Organza adds!


Now showing...

I thought I would share these pictures from my last ultra sound.
It's a girl!
Here is her profile. That big dot on the right is her hand.
And can you see 2 legs and a hand in this picture?
Her legs are crossed, and her fist is pointing straight at you!
I so want to get another 3D/4D ultra sound done when she is a little bigger so we can see her! This will most likely be our last child, so we won't have the opportunity again. Time to start saving my pennies for that photo shoot!


Wednesday, February 18, 2009

So Saffron, So Cute!

I came up with this quick project while cleaning up my craft room, soon to be nursery. I found a stack of these 4x6 acrylic photo frames that go on your fridge. So, I put one to use. Can you see the marker hanging from the ribbon? That's because it's a wipe off board!I love the way it turned out.
(Sorry the ribbon is a little wonky in the first photo)

I used So Saffron for my base. The DSP that you can see peeking through is from the FREE Sale A Bration pack of paper. Yummy stuff! I then used another piece of So Saffron followed by a piece of Whisper White.

I used my Crop-O-Dile to punch a hole into the first layer of the plastic frame. Yes, it cut right through - and it didn't crack the plastic! Woo hoo! I used the So Saffron Ribbon that you can get for FREE from the Sale A Bration catalog! I attached the wipe off marker to the ribbon using a piece of Sticky Tape.

The stamped images are from Just Buzzin' By. I used Basic Black to stamp them. A So Saffron marker, a Basic Black marker, a Blush Blossom marker, and my White Gel Pen to color in the bees.
So simple, and fun. These would be great door prizes, teacher gifts, or maybe a little housewarming gift.


Wednesday, February 4, 2009

Where is that recipe?

Here is a recipe box that will be featured at
an upcoming class at my church.
We will be using the Voila, and From the Kitchen of
stamp sets to create the project.
I punched the tabs using my circle punches and adhered them to the tops of my divider cards. I colored the Chef with my SU! markers, cut him out, and used dimensionals to pop him up on the recipe box.
If you are local, and would like to attend this FREE class - contact me by February 18th so I can prepare the stamped supplies for you!

Friday, January 23, 2009

Seeing Spots

I have been seeing spots every where! (And no, not just from my low blood sugar). Spots are so fun - when they are on paper or sheets! Here is a 6x6 page that will become a 12x12 page soon.
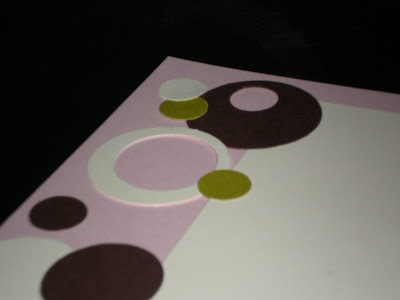
I used a Pink Pirouette base, Very Vanilla for the mat, Kiwi Kiss, Very Vanilla, and Elegant Eggplant for the circles. To create the circles, I used various Stampin' Up! circle punches. I also used a piece of Kiwi Kiss Satin Ribbon. Yummy stuff!

To make the circles with the centers punched out, I first punched the smaller circle into the card stock, and then used the larger punch for the larger circle. Clear as mud? If you go the other way... punch the large circle, then the small circle - you will have a hard time getting the card stock to come out clean or to come out of your punch at all.
Now, that being said... Stampin' Up! is now offering Circle Scissors and glass mat so you can create circles up to 6". You can do the same effect with the larger circles as I have done here with the new Circle Scissors. Or you can stock up on all the yummy new papers and stamps and get the Circle Scissors later - now that you know how to get a fun spot look!

Monday, January 12, 2009

Hostess Night

Blogger is finally letting me add photos!!
Here are the items that were made at my Monday night Hostess Club.
Our first project was a tag that could be used on a gift bag, a card, or scrapbook page.
We used Sahara Sand cardstock and the Top Note Big Shot Die. We used the soon to be retired Bronc Buster set with Chocolate Chip Classic Ink. We sponged the ink on top of the Die Cut to give it a leather look.
We added a Jumbo eyelet using the Crop-o-dile.
Then added a bit of Rope Twine to finish it off.

We made a gift bag using the Stampin' Up! white gift sacks. We used the Ahoy, Matey set - another set that is soon to be retired. We used Basic Black Classic ink on the bag and on the pocket tag. To create the tag, I used a Long Note with one side folded in half to create the pocket for the crayons. We used Sticky Strip to hold the sides of the pocket down.
A 1-3/8" circle punch in the top with a quick scissor snip to create the handle.
You can't have a gift bag without tissue paper. So we used the Matey's Map wheel - soon to retire - on white tissue paper. Super easy!


We also created a Valentine box using the Hostess Level 1 Prints pack, and the Big Shot Scallop Envelope Die. We added a cello bag of Dove chocolates to finish it off.


I made this for everyone. I used the Pillow Box Die with Pacific Point cardstock. I stamped the Thank You sentiment from the new single stamp - Elegant Thank You - that will be in the Spring-Summer Idea Book & Catalog. Each box contained an incentive stamp.

Here's another treat that I gave the girls. I made the "belly band" using Riding Hood Red and the birthday hat and present from the soon to be retired Crab & Co. Then stamped the birthday sentiment from the Family Phrases set on Pink Pirouette.


Saturday, December 27, 2008

In-Law gifts

Here are the 2 gifts that I made for my husband's parents.
The first was a canvas that I painted and applied a Decor Element to. I want the large version of this scripture to put in my kitchen! I love it! I added a strip of satin ribbon (non-Stampin' Up!) to the top and bottom of the canvas to finish it up.

The second gift was a large jar filled with those Christmas nugget candies. They are my husband's and his Mom's favorite Christmas candy. I added a Decor Element letter M to the jar to personalize it. Super easy, and they can use it year round!


Snow Swirrled Christmas

Here are the last minute Christmas cards that I made this year. I actually sent all that I made this time! I have a very bad habit of making Christmas cards, but never actually mailing or handing them out! This year, they made it into the mail - later than I wanted - but they made it none the less!
I used a Real Red base with an Old Olive mat behind the Very Vanilla front. The tree was stamped in Old Olive Craft ink and embossed with Iridescent Ice for a little shimmer. The sentiment was stamped in Classic Old Olive ink. I used my stamp-a-ma-jig to get the trees and sentiments straight on all the cards! To finish the card off, I added a Real Red 1/4" Grosgrain Ribbon.