Tuesday, November 23, 2010

Rock Star!

This is a card that we made at our last Hostess Club! It was so much fun teaching the "kiss" technique! I CASED this card from Mik Inks We used the Extreme Guitar stamp stamped in Not Quite Navy. Then stamped a circle stamp from Circle Circus in Basic Black. We put the Circle Circus stamp right onto the Extreme Guitar and gave the circle stamp a little twist. We kept twisting until we were satisfied with the coverage. The coolest thing about his technique is that everyone's was different!

We layered the Whisper White cardstock onto a piece of Basic Black. The striped paper is from the Regals Patterns Designer Series Paper Pack. The birthday paper was created in Word and printed on Whisper White cardstock. So fun! Give the technique a try!

Monday, November 15, 2010

Craft fair part 2!

I had a great time at the MOPS craft fair on Saturday. I think I made too much stuff because even though I sold a TON of items - I came home with a lot too! Lucky for you... I'm having a Craft Fair Part 2 this Saturday at my house! Here are a few of the items that I had at the original fair, and will possibly have at the second one! There's too much stuff to post, so be sure to stop by if you are local!


I {heart} Purses!

And these gift card purses are no exception! I bought the Tres Chic pattern from Becky Roberts here. I used up a lot of my retired Stampin' Up! cardstock - but love that you can use any cardstock that you want!

Some of these will be available at my Craft Fair part 2 on Saturday, November 20th!

Tuesday, November 9, 2010

Craft fair!

This Saturday, November 13th is the Calico Boutique Craft Fair at North Phoenix  Baptist Church! I will be there from 9am to 2pm with lots of Stampin'  Up! goodies, crafts, gifts, stocking stuffers, and more! I'd love to meet you! Grab a friend or two and get a head start on your Christmas shopping!


Saturday, November 13
9 am - 2 pm
5757 N Central Ave (Central & Bethany Home Rd)
Phoenix, AZ

Thursday, October 28, 2010

Hey there cupcake!

I made baby washcloth cupcakes! Fat free, ha ha! Each cupcake uses 2 washcloths. I found the cupcake boxes at the craft store. I stamped the baby stroller using the Fun & Fast Notes set, colored it in with my Pretty in Pink marker, covered the stroller with Crystal Effects and added some Dazzling Diamonds! They are so cute sitting on my table! My hubby thought they were real cupcakes! :)

Monday, October 25, 2010

Christiani-tea

I fell in love with these Christiani-teas when I saw them here on Janet Wakeland's Remarkable Creations site. You can find the download of devotionals under her Freebies tab.


I used the Big Shot to cut the Fancy Favor box to hold all the tea in. I used the Elegant Soiree Designer Series Paper to decorate the front of the box. I used some new Basic Pearls on a few of the boxes too. I used the Designer Lable punch for the front of the box with some Vanilla Hodgepodge Hardware. For the tea bag holders I used coordinating cardstock colors Crumb Cake, Marina Mist (it should be Baja Breeze but I didn't have any), Soft Suede, and Very Vanilla. I used the Scallop Trim Border punch on each holder too.  I used the Wide Oval punch for the devotion and embellished with a flower that was punched from the Boho Blossom punch. A brad holds it all together so that the holder can be used as a bookmark after they've enjoyed their tea.


Tuesday, October 19, 2010

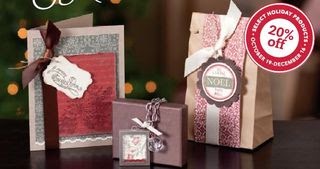
Make it a homemade holiday!


Special pricing available October 18 - December 16!
Place an order online at http://www.andreamason.stampinup.net/
and start your homemade holiday!


Sunday, October 10, 2010

Got Nuggets?


I do!! I have lots of nuggets all ready to go to my craft fair!! I love how simple these were to make and they look so cute too! I cut some Designer Series Paper into 1" x 3" strips, wrapped around a Hershey Nugget and secured with a little bit of Snail adhesive. I know you are going to want to know about the clear boxes I put them in!! I found them online at Clear Dollar Stamps. I wrapped another piece of DSP around the box and then ties a ribbon around the whole thing. Fun!

Tuesday, October 5, 2010

Don't miss out!


From October 5–18, we’re adding over two hundred more discontinued items-(some at up to 80 percent off!) to our Clearance Rack. Lots of paper, ribbon, embellishments, Big Shot dies, ink, and more! Hurry - they are only available while supplies last - and you can only order them from my website! http://www.andreamason.stampinup.net/

Things to know about the Clearance Rack Blitz:

Orders for Clearance Rack items can be placed through my Online Store.
Qualifying orders are eligible for hostess benefits/Stampin’ Rewards.

While the Blitz last from October 5–18, some items, depending on availability, may be made available in the Clearance Rack in the future.

All discontinued items are available only while supplies last.

All sales of discontinued items are final.


Tuesday, September 21, 2010

When life gets too hard to stand...

kneel!

Here's another vinyl project using Black Decor Elements Vinyl sheet and my cricut. It is on a square plate. Talk about a fast project!

Hem your blessings

I bought this large serving dish at a local store and knew just what I was going to put on it! The Hem Your Blessings Decor Element! This is the small decor element (#121635). I still need to test the heat factor of these Decor Elements on platters, but I can tell you that I have a water bottle that has been decorated with Decor Elements that has survived hundreds of washes in the dishwasher. So... I will post my findings on this one soon!

Sunday, September 19, 2010

More vinyl!

I found this board at a local craft store (on sale of course)! It was already painted too! I used my Cricut to cut some letters from Black and Pretty in Pink Decor Element Vinyl Sheets. I used the transfer tape that came with the vinyl to apply the letters right to the wood! Another easy and quick project!

Friday, September 17, 2010

Grandma Plate

No, I'm not a Grandma! But I know a few that would love this charger/plate! I used my Cricut to cut a sheet of Sahara Sand Decor Element Vinyl (#118812). I used a piece of transfer tape that came with the vinyl and applied it right to the plate! Ta da!! A cute, inexpensive gift that even Grandma will love!

Wednesday, September 15, 2010

Leave a message...

I bought an 8x10 canvas and covered it with our fabulous new Designer Fabric. This one is called Deck the Halls (#121716). And guess what... I still have a ton of it left over for another board or three! These are extra wide fat quarters that measure 28"x18" for $9.95. A great deal if you ask me!

On to the project...
I used a staple gun to attach the fabric and Crochet Trim to the back side of the canvas. Easy!! I then used 2 Vintage Brads to give it a more finished look.


Here's a close up of the Crochet Trim and Vintage Brad.

Friday, September 3, 2010

Christmas Stamp A Stack


Join me on Friday, October 1 to start your 2010 Christmas cards!
We will be creating 12 amazing cards and a bag of gift tags from 6-9 PM. Cost is only $20 if you pay in full by September 15th ($25 for any reservations after the 15th).

Can't join us on the 1st but want to create these cards? Email me and I will send you the supply list. You can purchase everything you need on my website at www.andreamason.stampinup.net and have it shipped right to you!

If you have any questions, please let me know!

Thursday, September 2, 2010

Gratitude

I've never sent Thanksgiving cards. But every year at a certain craft fair, I have requests for them. So... here's one that I will be offering!
I used a Very Vanilla base. The leaves were cut using the Stampin' Up! Sizzix Leaves #2 die. The colors are Cajun Craze, Early Espresso, Cherry Cobbler, and Daffodil Delight. The polka dot paper strip is from the new Designer Series Paper pack! The Gratitude sentiment is from the Define your Life set. I used Cajun Craze Classic ink for the sentiment and to put some definition on the leaves.

Monday, August 30, 2010

Inspired

Here's a card I made for my friend's birthday. I used the Inspired by Nature set. I love this set! The card stock colors are Always Artichoke, Bravo Burgundy, and Natural White.The Classic ink colors are Chocolate Chip, More Mustard, and Always Artichoke. The ribbon and hardware are retired, but there are other great substitutes available from Stampin' Up!

Thursday, August 26, 2010

You want S'more?!

I have had several requests for "S'more" information about this fun project! So... because I love what I do, and I share what I love... here you go!
-The box is from Stampin' Up! Sizzix Box #2 die. I ran it through my Big Shot using a piece of Not Quite Navy card stock.
-Randomly stamp the star image from the Under the Stars set using Basic Black Classic ink.
-The Large Oval punch was used to create the open window on the box.
-A small piece of Sticky Strip is used to hold the whole box together!
-The bear from the Under the Stars set was stamped twice. Once on Crumb Cake card stock, and once on Chocolate Chip textured card stock. -The tummy from the Chocolate Chip was cut out and adhered to the Crumb Cake bear using a Dimensional.
-The s'more was stamped on Crumb Cake card stock. It was colored using More Mustard and Chocolate Chip markers. The marshmallow was colored in using the White Signo Gel Pen!
-Cut out the s'more and adhere it to the bear paw using a Dimensional.
-Then adhere the bear and s'more to the box using Dimensionals.
-The s'more mix is Golden Graham cereal, chocolate chips, and mini marshmallows. It is packaged in a small cello bag, and tied with Whisper White Grosgrain ribbon.
So there you have it! I shared what I love, will you share with me? I would love to see your S'more creations!
If you want to see even more great ideas, check out Sherrill Graff from Late Night Stamper (LNS). She has some amazing ideas and a love for Stampin' Up! Demonstrators like no other!

Wednesday, August 18, 2010

Just cover it!

Fabric is coming in the Holiday Mini!! It's sooo pretty and magical! Really! Look what it turned this ugly canvas in to...

Ok... so maybe it's not magical, but it sure is beautiful!
I used an 8"x8" square piece of the fabric, and a 7x7 piece of batting. A staple gun is all I needed to adhere both to the wood frame. I used the staple gun to adhere to Very Vanilla ribbon too. A brad in the center to give it a little something, and ta-da! A fun place to add photos or notes. I will be making a larger version soon - so easy!!

Sunday, August 8, 2010

Chicks & Chocolate Cards!!

I am so excited!
Here are the cards we will be creating at the Chicks & Chocolate Stamp A Stack on August 20th!
There is still time to reserve your spot. The cost is $20 if you reserve your spot by August 13th, it will be $25 for reservations after the 13th. You can mail my your payment or drop it off to me this week!
You will make 3 cards of each for a total of 12 cards (envelopes included)!


And a 3D project that will leave you wanting S'more!