I'm so excited to share with you that you can now shop on my Stampin' Up! web site 24 hours a day! So when you awake from a dream in the middle of the night with the ideal scrapbook page or project - you can jump online an order your supplies! For all of you night owls - no more playing phone or email tag (although it is quite entertaining at times)!
In order to receive catalog pricing and Hostess benefits, you must shop through my website! Please also note that you must still contact me to place workshop orders if you have collected orders other than your own. Orders placed through my web site will be mailed directly to you!
Here are som more important FAQs about online ordering:
Q: What is a demonstrator’s web site and what can I find there?
A: Your demonstrator may have a personal web site where you can order online. In addition to the store, you will also find event notification, project ideas, and personal information to help in your own creativity. To find if your demonstrator has a web site, use the Demonstrator Directory to locate her. If she has a web
site, a link to her site will be listed next to her name on the results page.
Q: How do I buy products online?
A: As with many other online ordering systems, adding the items you would like to purchase is accomplished through a virtual shopping bag. Click the Add to Bag button on any item or project page, and we will keep track of those items for the shopping session. When you are ready to make your purchase, simply click the
Checkout button from your shopping bag and follow the information prompts through the checkout process. The last screen in the checkout process is a printable receipt. Following a short processing time, your order will be shipped to your specified address.
Q: What are the advantages of ordering through your demonstrator’s web site?
A: By placing your order on your demonstrator’s web site, you will receive the best pricing, best shipping rates, and be eligible for Stampin’ Rewards (described below). You will also be clicks away from your demonstrator’s personal content to help guide you in exploring your creativity.
Q: Is there a difference in the products I find in the catalog and those online?
A: The product offerings are basically the same; however, some products or promotions may only be available through your demonstrator and some available only online. You will want to contact your demonstrator for demonstrator specials, and watch online for others!
Q: How can I find an item from the catalog?
A: If you have a current Idea Book & Catalog, you can enter the item number directly into the Search the Store field above the product categories navigation on the left. This will return the items and projects available through Online Ordering.
Q: The item I want is grayed out? How can I order this item?
A: This item is currently on backorder or temporarily unavailable for order. As suggested, please try back in the future to purchase this item.
Q: What is discount pricing? Why do you do this?
A: Discount pricing is pricing available if you order through a Stampin Up! demonstrator. With a demonstrator, you not only get the advertised discounted price, but you also get the added value as a creative coach in helping you explore your own creativity. By ordering through a demonstrator, you make
the most of the products you purchase online. Please note, if you are on a demonstrator’s web site, you will only see the discount pricing.
Q: Is your site secure?
A: The Stampin’ Up! store has been verified by VeriSign to be secure for commercial transactions. In addition, Stampin’ Up! has received accreditations from the BBB (Better Business Bureau) for customer service standards. You can be perfectly confident that your transactions will be secure. If you would like to
learn more about our security, please see the Security Policy document.
For more information about VeriSign, visit http://www.verisign.com.
For more information on the BBB, visit
http://welcome.bbb.org.
Q: What types of payment do you accept?
A: We currently accept credit card payments made using Visa and MasterCard. We also accept Discover in the US.
Q: How long will it take for me to receive my order?
A: When you check out, you will see our current order processing and handling time. In addition, you will need to add your chosen shipping method to calculate the total time to receive your order. After placing you order, you can check your order status and get tracking information in the My Account area of Online
Ordering.
Q: How can I check on the status of my order?
A: When you log in to your account, you will be able to check the current order status from your My Account page. The Order History tab will have order information, shipping tracking information, and will contain orders from the past 12 months. You may also contact customer service at 1-877-iSTAMP2.
Q: How can I contact the company?
A: To contact customer service you may call 1-877-iSTAMP2 Monday through Friday 7:00 AM through 7:00 PM (MT). You may also e-mail us at
cs@stampinup.com.
Q: What are Stampin’ Rewards, and how do I earn them?
A: The Stampin’ Rewards program awards free merchandise to you when you place an order of a certain amount. You can qualify for Stampin’ Rewards (which includes both free dollars and free, exclusive stamp sets) only when you place an order on your demonstrator’s web site. Awards can only be redeemed at the
point of purchase, so if you qualify for Stampin’ Rewards, please be sure to choose them before you complete checkout. Otherwise, you’ll lose them.
The award tiers are available from the Stampin’ Rewards link at the bottom of the store page on your demonstrator’s web site.
Q: How does Stampin Up! calculate sales tax?
A: When you enter the payment and billing screen, we will calculate your tax based on the ZIP Code you have entered as part of your billing address. For the most accurate calculation, please enter your ZIP Code + 4. You may look up your ZIP Code at http://zip4.usps.com/zip4.

 The second gift was a large jar filled with those Christmas nugget candies. They are my husband's and his Mom's favorite Christmas candy. I added a Decor Element letter M to the jar to personalize it. Super easy, and they can use it year round!


 The side:
 The inside:
 The goodies:
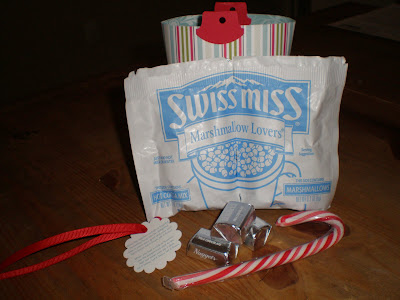 The tag from


 No fire! It did discolor the tissue a little bit - but I would have no worries about burning these stamped candles.


 I used the "for you" stamp from the Fresh Cuts stamp set.
 Here's a closer look at the completed tag. Are you wondering what I've attached my tag to?
 To do this, I used 2 brown paper lunch sacks and cut them into strips down to the base of the bag. I added a wrapped popcorn ball to the center of the bag and then gathered the strips at the top, tied a piece of ribbon and attached the tag.