

Monday, December 31, 2007
Our Family


Friday, December 28, 2007
Fancy Gift Card Giving
Normally, I hate giving gift cards. That is until Mary Brown shed a new light onto the presentation of gift cards! Check out her gift card holder here: http://stampercamper.com/2007/11/29/gift-card-holder/ Here is a fun way to give a gift card and a little something extra for the recipient.
I found this cute wrapping paper at Hobby Lobby. I wrapped my Sister-in-law's scrapbook with it, and had a 12" x 24" piece left. Knowing that I probably wouldn't have any use for a scrap piece that size, I pondered on what to do with it. Then it hit me! I remembered the cute gift card that Mary Brown did. I happened to have a Giant Hershey candy bar (don't ask) and decided to give it a whirl! I also found a piece of Purely Pomegranate Satin ribbon in my stash.
Here are the step by step instructions so you can create your own!
 Start with a piece of wrapping paper, or other paper and a candy bar. It doesn't have to be the Giant size, but is fun to give and to receive! Wrap the candy in the paper, leaving the ends open so you can see the silver foil on the candy bar.
 Use the gift card as a template to cut a piece of cardstock about 1/2" wider on each side, and long enough to wrap around the gift card itself. Mine is 4 1/2" x 11". I then used my scoring blade to score the cardstock so that the paper would wrap around the card. I then used my Slit punch to cut 2 slits on the sides for the gift card to slide under - again using the gift card as a template to know where to punch. Note: you can make your holder using just the gift card, but I chose to leave the card in the original holder also.

Then take a piece of ribbon that is about 3 times the length of your candy bar. Slide it under your paper between the candy bar and the paper.

Then guide the ribbon through the Slit punches on the card holder.

Place your gift card into place under the Slit and over the ribbon.

Tie your ribbon, and then embellish the front of your card holder as desired. I added a 1 3/8" circle that I had left from making the party favors. I used my Snail adhesive on the back of the circle, and placed it 1/2 way on the top flap and 1/2 on the bottom to create a solid closure.
I found this cute wrapping paper at Hobby Lobby. I wrapped my Sister-in-law's scrapbook with it, and had a 12" x 24" piece left. Knowing that I probably wouldn't have any use for a scrap piece that size, I pondered on what to do with it. Then it hit me! I remembered the cute gift card that Mary Brown did. I happened to have a Giant Hershey candy bar (don't ask) and decided to give it a whirl! I also found a piece of Purely Pomegranate Satin ribbon in my stash.
Here are the step by step instructions so you can create your own!
 Start with a piece of wrapping paper, or other paper and a candy bar. It doesn't have to be the Giant size, but is fun to give and to receive! Wrap the candy in the paper, leaving the ends open so you can see the silver foil on the candy bar.
 Use the gift card as a template to cut a piece of cardstock about 1/2" wider on each side, and long enough to wrap around the gift card itself. Mine is 4 1/2" x 11". I then used my scoring blade to score the cardstock so that the paper would wrap around the card. I then used my Slit punch to cut 2 slits on the sides for the gift card to slide under - again using the gift card as a template to know where to punch. Note: you can make your holder using just the gift card, but I chose to leave the card in the original holder also.
Then take a piece of ribbon that is about 3 times the length of your candy bar. Slide it under your paper between the candy bar and the paper.

Then guide the ribbon through the Slit punches on the card holder.

Place your gift card into place under the Slit and over the ribbon.

Tie your ribbon, and then embellish the front of your card holder as desired. I added a 1 3/8" circle that I had left from making the party favors. I used my Snail adhesive on the back of the circle, and placed it 1/2 way on the top flap and 1/2 on the bottom to create a solid closure.
A Favor or 50!
I just finished these party favors for my Sister-in-laws shower tomorrow. They are very cute!

I used the Baby Firsts stamp set (which retired last year) that I borrowed from my friend Suz. Thanks Suz! I used Basic Black ink to stamp them onto Whisper White cardstock, I then used my 1 3/8" circle punch to cut around the images. I colored the babies using my Stampin' Up! markers. For the skin tone, I used Barely Banana! Normally I would have used Creamy Caramel, but it seemed too dark for the babies. I then used my scallop punch and cut 100 scallops! To adhere them, I just used some double sided tape and sandwiched them over a York Peppermint Patty. Almost too cute to eat!
A Scrapbook gift for my Sister-in-law
My Sister-in-law, Nickie, is having her baby shower this weekend. I thought I would make her a baby scrapbook! All she has to do is add some cute photos and a little bit of journaling.


I used the Special Delivery Boy - Simply Scrappin' kit from Stampin' Up! I loved how easily the pages went together. If I had to buy all of the coordinating paper, and die cuts, then assemble it all, it would hae easily taken me 2-3 days to create this. However, because I had the kit - it took me about 2-3 hours! Love it!!
The coordinating colors are Apricot Appeal, Soft Sky, Wild Wasabi, and Sahara Sand. Because Wild Wasabi, and Soft Sky are current "In-Colors" - this kit will retire in 2008! It has convinced me to buy more of these - especially because everything is ready to go! I can handle that!


Non Stampin' Up! stuff:
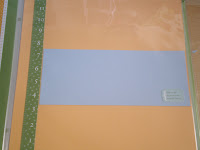
I had this blue polka dot paper left over from a different project, so I thought I'd use it up here. I also used my Cricut to cut out the baby's name (and the Mom & Dad title on the first page) using Soft Sky cardstock. The Apricot Appeal color sticker next to his name says "Hello, my name is..." The Wild Wasabi green paper, and the embellishments are from the Special Delivery Boy kit. I found the album at Target. It is a shade lighter than the Wild Wasabi. The cute blue feet were left over from another project also.
I had this blue polka dot paper left over from a different project, so I thought I'd use it up here. I also used my Cricut to cut out the baby's name (and the Mom & Dad title on the first page) using Soft Sky cardstock. The Apricot Appeal color sticker next to his name says "Hello, my name is..." The Wild Wasabi green paper, and the embellishments are from the Special Delivery Boy kit. I found the album at Target. It is a shade lighter than the Wild Wasabi. The cute blue feet were left over from another project also.


Thursday, December 27, 2007
Time Well Spent Coasters

All you need to do it buy a few 4"x 4" Bottochino tiles (be sure they are unglazed) at your local Home Depot, Lowe's, Floor & Decor, or any store that carries tiles. Simply wipe the tiles with a damp cloth to remove the white dust from the tiles.
Then stamp your main image using Staz-On ink. You can use line images if you want to color them in, or solid images (like the horses below) if you want a solid color. Staz-On comes in many colors, but I used black here.
Then color your images in using Sharpie markers. You can use any permanent marker, but I prefer the Sharpies - especially because they come in so many colors!
The best part? No need to seal the coasters. They are ready to use! Perfect for quick party favors or last minute gifts!
These were actually made for my Aunt Erika for Christmas! I used the Time Well Spent level 3 Hostess set for these coasters. The only way for you to get these stamps is to have a qualifying workshop and earn benefits for a level 3 set. There are so many great Hostess sets in the new catalog! What? You don't have your new catalog yet? Contact me today to find out how to get your own copy!!


A few Christmas cards to share...
 A Little Snowflake Spot. Stamped on Buckaroo Blue base (which is now retired - but I had to use it up!), with a layer of Not Quite Navy, and Whisper White cardstock. The Whisper White then received a little trim around the corners using my slot punch. The main image was stamped in Not Quite Navy, while the small snowflakes on the base were done using Versamark. I added a little sparkle jewel to the center of the snowflake.
 This card was messy, but so pretty! I used a Whisper White base with a strip of Not Quite Navy along the bottom of the card. I stamped the images from Snowflake Spot using Not Quite Navy, Brocade Blue, and Tempting Turquoise. After allowing to dry for a minute, I took my Versamark pad and covered the images on the Whisper White. I then added my Dazzling Diamonds Embossing Powder over the wet Versamark ink. (To make the embossing powder, I simply took Clear embossing powder and added Dazzling Diamonds). I then used my heat gun to set the embossing powder. I added my strip of Not Quite Navy with a Merry Christmas sentiment to the bottom (stamped in Not Quite Navy) using a little bit of double sided tape. To finish it off, I added a little white ribbon using a couple glue dots.
Retired SU! Accessories
So long 8 1/2 x 11 Linen albums. So long Envelopes. Goodbye Designer Series paper.
Goodbye Simply Scrappin' Kits...
Here's the list of accessories that Stampin' Up! will be retiring this year. The list will be updated regularly as these items are only available while supplies last. So get your orders in today!
Remember, all orders placed with me during the month of December will receive FREE shipping!
Items in RED are no longer available.
Item # Product Description
109198 Accents & Elements Borders & Blossoms
109199 Accents & Elements Little Reminders 2
109197 Accents & Elements Tagged
100700 Album Leather Post Black 8-1/2x11
105385 Album Linen Post Mellow Moss 8-1/2x11
104520 Album Linen Post Natural 8-1/2x11
104517 Album Linen Post Navy 8-1/2x11
105382 Album Linen Post Real Red 8-1/2x11
105392 Album Linen Ring Mellow Moss 8-1/2x11
104510 Album Linen Ring Natural 8-1/2x11
104513 Album Linen Ring Navy 8-1/2x11
105388 Album Linen Ring Real Red 8-1/2x11
105067 Boxes & Tags Pockets & Pieces Assortment I
105068 Boxes & Tags Pockets & Pieces Assortment II
108798 Boxes & Tags Tiny Takeout Confetti White
107246 Boxes & Tags Tiny Takeout Kraft
105747 Boxes Stamp & Supply Extra Large
105748 Boxes Stamp & Supply Extra Large Divided
105744 Boxes Stamp & Supply Extra Small
105749 Boxes Stamp & Supply Jumbo
105734 Boxes Stamp & Supply Large
105746 Boxes Stamp & Supply Medium
105745 Boxes Stamp & Supply Small
101052 Brayer Attachment Foam
107293 Cards & Envelopes Greeting Very Vanilla Medium
109149 Designer Series Paper Brocade Background
109161 Designer Series Paper Cerise
109162 Designer Series Paper Charbon
109155 Designer Series Paper Creepy Crawley
109152 Designer Series Paper Darling Doodles
109150 Designer Series Paper Dashing
108503 Designer Series Paper Petals & Paisleys
109156 Designer Series Paper Linen Prints
109147 Designer Series Paper Notations No. 2
109148 Designer Series Paper Outlaw
109158 Designer Series Paper Uptown
109157 Designer Series Paper Wintergreen
107285 Envelopes Open End Very Vanilla Large
107284 Envelopes Open End Whisper White Large
107296 Envelopes Shimmery White Medium
107287 Envelopes Square Vellum Large
107310 Envelopes Square Very Vanilla Mini
107294 Envelopes Vellum Medium
107290 Envelopes Very Vanilla Large
107291 Envelopes Whisper White Large
101016 Eyelet Tool Kit
105317 Eyelets Bold Brights II
105379 Eyelets Silver
105315 Eyelets Soft Subtles II
107282 Fancy Fibers Bella
107283 Fancy Fibers Elizabeth
103352 Stampin' Glitter Romantic Red
103349 Stampin' Glitter Silver Shine
106650 Greeting Glue
102620 Liquid Glue
103145 Page Protectors Post 8-1/2x11
104523 Page Protectors Ring 8-1/2x11
103598 Paper Vellum 12x12
105543 Pastel Refills Bold Brights
105544 Pastel Refills Earth Elements
105547 Pastel Refills Neutrals
105545 Pastel Refills Rich Regals
105546 Pastel Refills Soft Subtles
105962 Perfect Layers Tool
104184 Post Extenders
106522 Punch Spring Bouquet Flower
109722 Simply Scrappin' Creative License Hostess Level 1
109611 Simply Scrappin' Happy Me Hostess Level 3
109596 Simply Scrappin' Out & About
109626 Simply Scrappin' Primary Colors
109649 Simply Scrappin' Round Up
109635 Simply Scrappin' Secret Garden
109663 Simply Scrappin' Winter Bright
107415 Simply Sent Friendship Shapes
109230 Simply Sent Happy Day
105580 Spectrum Pad Blue Frost
101492 Spectrum Pad Celebration
105579 Spectrum Pad Cotton Candy
101336 Spectrum Pad Pumpkin Patch
100000 Spectrum Pad Un-inked
103953 Stamp-a-ma-jig Imaging Sheets Refill
104432 Stampin' Around Cartridge & Ink Refill Clear Embossing
101460 Stampin' Around Cartridge & Ink Refill Whisper White
102391 Stampin' Around Ink Refill Clear Embossing
103017 Stampin' Around Ink Refill Whisper White
103151 Stampin' Emboss Powder Hologram Highlights
105677 Stampin' Kids Pad Bear Brown
105676 Stampin' Kids Pad Beetle Black
105675 Stampin' Kids Pad Boxcar Blue
105674 Stampin' Kids Pad Gumball Green
105673 Stampin' Kids Pad Poppin' Purple
105672 Stampin' Kids Pad Princess Pink
105671 Stampin' Kids Pad Robin Red
105670 Stampin' Kids Pad Yahoo Yellow
103174 Stampin' Pastel Applicators
100852 Stampin' Pastel Erasers
100081 Stampin' Write Marker Going Gray
100945 StazOn Ink Refill Timber Brown
103088 StazOn Pad Timber Brown
107235 Tag Sheets Bold Brights
107239 Tag Sheets Confetti White & Kraft
107236 Tag Sheets Earth Elements
107240 Tag Sheets Kraft
107237 Tag Sheets Rich Regals
107238 Tag Sheets Soft Subtles
100894 Watercolor Brush Flat
101551 Watercolor Brush Medium
101331 Watercolor Brush Small
105395 Wire Works Metallic
105652 Wrapping Paper Whisper White
Stampin' Around wheels
100360 Acorns
109812 All about Birthdays*
109690 All about Christmas*
109812 All about Gratitude*
109676 Autumn Dots
104070 Bloomin'
107466 Bodacious*
105750 Bouquet*
107481 Butterflies & Blossoms
104065 Fishy
100267 Happy Jacks
107563 Ho Ho Ho
104312 Hot to Dot
104279 Leaf Prints
106062 Leaves Awash*
107479 Rough around the Edges*
101927 Snowman Fun
107465 Speckled*
105521 Spooky Skyline*
108979 Spotted*
107480 True Hearts
105033 Wings & Things
* Jumbo Stampin' Around wheels
Tuesday, December 18, 2007
Beautiful!
My new catalog arrived last night! It is so pretty!! I can't wait to deliver your very own catalog so we can share the excitement. I am expecting them the week of Christmas. Let me just say... you should save some of that Christmas cash you might receive!
If you aren't part of my Hostess club, but would like a new catalog, you can order one for only $5. This is so much more than just a pretty catalog! There are hundreds of great card and scrapbook samples, home decor, and gift ideas!
If you are interested in joining a Hostess club, contact me. My first club starts in January!
Monday, December 17, 2007
I'm expecting...
my new 2008 Stampin' Up! Catalog today! I was reading on Splitcoast Stampers how several demos in the Phoenix area received their copies this weekend. Can't wait to get home and see if the mailman brought mine today!
The UPS guy is also due for a delivery today. I ordered some new SU! Rub-ons from the preview catty, but they were on backorder. They were only a few days behind the delivery of all my other fun new toys!
I will be testing the Rub-ons out this weekend, and will report back to you! They do seem to be a great value - cost wise. Can't wait to see how they compare to other rub-ons - quality wise.
Sunday, December 9, 2007
Wild West Christmas
 This is a Wild West gift set that I made
 for someone in my family. Using a brown craft gift bag, I added a strip of Outlaw paper to the front using SNAIL. I then stamped the horse from the Wanted set in Chocolate Chip Classic Ink onto Whisper White Cardstock, and layered it onto Sage Shadow Cardstock.
I added a silver heart embellishment for a little extra touch.
I then created a set of 4 tile coasters using the Bronc Buster set. I stamped the image onto 4" bottochino tiles (from Home Depot) using brown Stazon.
I inked the edges of the tile with the Stazon too.
Then my blog surfing brought me to the final project for the gift set. I was looking at Diane's blog and her beautiful Christmas stamped candle holders. Check them out on her blog... http://stampwithdiane.blogspot.com/2007/11/stamped-candles-and-candle-holders.html
I knew they would be the perfect addition to my gift set with year-round cowboys stamped on them. I got the glass containers at the Dollar Store and used brown Stazon to stamp the images. I let them dry overnight, and presto... cute glass containers to add to my gift. I am planning on adding some rootbeer jelly beans to the container with the lid, and a votive to the open container.
I knew they would be the perfect addition to my gift set with year-round cowboys stamped on them. I got the glass containers at the Dollar Store and used brown Stazon to stamp the images. I let them dry overnight, and presto... cute glass containers to add to my gift. I am planning on adding some rootbeer jelly beans to the container with the lid, and a votive to the open container.


4 little snowmen
 How cute is this? My crafty friend Suz made this glass ornament using my 3 year old nephew's handprint! The stamped his hand on a piece of transparency using SU! White Craft Ink. She then embossed it with clear embossing powder. After it has set, she used Sharpie markers to detail the fingers into snowmen! We added a bit of snow filler and a few dots of white ink. Que cute, as Suz would say!
Here's the poem that goes with these snowmen... I changed it from "five snowmen" to four, since that's all we could fit into the circle.
These aren't just four snowmen
As anyone can see.
I made them with my hand
Which is a part of me.
Now each year when you trim the tree
You'll look back and recall
Christmas of 2007
When my hand was just this small!
Ahoy, Matey!
Happy Birthday Ethan!

This is the card I made for Ethan's 2nd birthday. It was so much fun to get to see Ethan and Alex. They live in Las Vegas, so we don't get to see them all of the time. I can't beleive how much those boys have grown!
I used the Ahoy, Matey set (which thankfully didn't retire, because this is the first time I was able to use it!), and the Map Wheel.
Cardstock: Matey is stamped on Whisper White, layered on Really Rust, Map is on Old Olive, Card base is Not Quite Navy
Ink: Matey is stamped in Basic Black, and colored with Old Olive, Creamy Caramel, Night of Navy, Chocolate Chip, Ruby Red, Going Gray, and Basic Black.
While some of the colors aren't exact matches to the cardstock - they were really close and worked well together!
Friday, December 7, 2007

Saturday, December 1, 2007
Happy Retirement!

Say goodby to some of our beloved Stampin' Up! stamp sets!
Follow the link to view the list.
If there are any hostess sets that you want to add to your collection before they retire,
contact me today to find out how you can get them!
If there are any on this list that you want, contact me today to place your order - before it's too late! These are only available while supplies last!
The accessories retired list will be available on December 10th.
5 Fabulous Gifts Under $25
Still not sure what to ask Santa for this Christmas? Here are some great ideas that will enhance your stamping and scrapbooking supplies, and not break the bank!
http://www.stampinup.com/us/enu/9291.asp
Contact me today to place your order.
Paper Cutter, $24.95 Whether you have a passion for scrapbooking, card making, or paper crafts in general, this portable and lightweight cutter is a must. It cuts paper up to 12" wide and has easy-to-read grid lines. Use item number 104152 to order this from your demonstrator .
Big Flowers, $22.95 With eight fun images, this stamp set is great for year-round card making and scrapbooking. It also coordinates perfectly with our Circle punches and Little Flowers stamp set. This is item number 109405 when ordering from your demonstrator.
Home Again Simply Scrappin', $19.95 Simply Scrappin' kits make scrapbooking and card making easy and fast. Kits include Designer Series paper, coordinating card stock and self-adhesive die cuts, ensuring your project will coordinate perfectly while saving you time. Order this from your demonstrator using item number 109597 when ordering from your demonstrator.
Simple Serif Mini Alphabet & Numbers, $20.95 Alphabet sets are a core product when scrapbooking and card making. This set includes both alphabets and numbers! Give your demonstrator item number 109429 to order this set.
Earth Elements Classic Stampin' Spots, $22.50 These 1" square ink pads are an affordable way to sample all the colors in a color family! Use item number 105551 to order these ink pads.
Friday, November 30, 2007
PayPal
Would you make your purchases using a debit or credit card if I offered PayPal to you?
I'm looking into the possibility of offering this service to my customers but would first like to know if my customers would use it rather than cash or check.
It would work like this: you place an order with me, I calculate your total, then send you a PayPal invoice via email. You get the email, click a link, and enter your payment info. It goes into my account, and I can then place your order. Theoretically, it shouldn't take any longer to place your order, but I haven't gone that far into my research to find out if there are any waiting periods.
So... customers... please leave me a comment and let me know your thoughts - you can email or call me too!
Wednesday, November 28, 2007
What's your heart song?
I love Happy Feet! I love penguins! I love the music in this movie!
Thought I would share a few songs that will get you moving in your chair. If you haven't seen the movie - what are you waiting for? It is good family fun! I think we'll add it to our list of movies to watch this weekend, although we've seen it so many times I may be the only one in the livingroom watching it... good times!
Ho Ho Homemade Holiday!

Using a simple red gift bag, I added a strip of torn Whisper White cardstock to the center with my Snail adhesive. I then punched out 3 circles with my 1 3/8" SU! circle punch. I free handed the 2 rectangles and 2 squares to create the belt.
I stamped the tissue paper using the tree from the Wishing You Cheer set in Handsome Hunter Green.
I saw one like this on starlightstamper.com. Wanda did a cute bag that was a little thinner than mine.
Another ornament
I know it's not a great photo but... I love this ornament!
It features an embossed handprint of our friend's 18 month old daughter.
 I placed her hand in Versamark ink then placed it on the rough side of an inkjet transparency. I added detail black embossing powder and the used my heat gun to emboss the handprint. I hand cut the circle, which is approximately 4". I then rolled the image into a tube and placed it inside of the glass ornament. I added silver stars to the ornament for a little something extra. Using my large SU! oval punch, I made a name tag and used my silver gel pen to write the year and her name.
Monday, November 26, 2007
Mom & Me
Spend a little quality time with your child during this busy holiday season. Join me on Sunday, December 2nd to create some beautiful Christmas ornaments with your child.
December 2nd
3:00 - 6:00 pm
There are still a few spots available,
so contact me today if you are interested!
Did I mention that the chocolate fountain would be flowing?
Saturday, November 24, 2007
Pearl-Ex Ornament

Pretty, huh?
It was a very easy project!
All you need is:
Spray adhesive
Glass ornament
Pearl Ex

I removed the top from the ornament. Sprayed the adhesive into the ornament and shook it around to coat the inside of the ornament. I then added Turquoise Pearl Ex to the ball and shook it around. Then I added Interference Red Pearl Ex and shook again to fill in the spots where the blue didn't go. I let it set for about half an hour, to let the fumes disipate. Replaced the top of the ornament, and added the ribbon to hang it.
I have a few small ornaments from the Dollar Store that I think I will try later.
Friday, November 23, 2007
Loads of Love


Supplies:
Onsie
Stazon ink in black and red
Q-Tips
Cardboard
Heat gun
I started by placing a piece of cardboard into the neck of the onsie - to avoid the ink from seeping through to the back side. I then inked the truck from Stampin' Up's! Loads of Love set with the black stazon. After letting it set for about 15 minutes, I used a q-tip to draw up red stazon and dotted the red onto the onsie. I then used the black stazon for the tires, and brushed the black stazon across the center caps to make a gray color. I then used my heat gun to set the image and color into the onsie.
I flipped the onsie over and stamped "Loads of Love" onto the butt of the onsie. My hubby thought that was "cute". I again used the heat gun to set the ink.
My next adventure will be to wash the onsie, and see how the ink holds. Stay tuned!
Wrapping up the holidays with Stampin' Up!
I hope you had a blessed Thanksgiving with family and friends!
To start the Christmas season off right,
Stampin' Up! is offering some great specials.
These specials are valid starting today until December 15.
http://www.stampinup.com/us/documents/US_Wrapping_Flyer_1107.pdf

Please note that the Purely Pomegranite, and Chocolate Chip Satin Ribbon special is only valid while supplies last - so order soon!
Here's another treat for you! Did you like the projects featured on the flyer? I've attached the project instructions so you will know exactly what you need to complete the gifts.
http://www.stampinup.com/us/documents/PROMO_holidayWrap_Recipes_DEMO.pdf
Monday, November 19, 2007
New Designer Series Paper!
Aren't these colors beautiful?
You'll have to wait until January 2nd to order the new designer series paper, but you can stock up on the coordinating colors while you wait!

Bali Breeze coordinating colors: Old Olive, Taken With Teal, Rose Red, Pumpkin Pie

Ginger Blossom coordinating colors: Ruby Red, River Rock, Cameo Coral, Groovy Guava
Each of these designer series paper packages contain a 2007-2008 In-Color. Remember that you can get double stiched ribbon, Classic ink pads, refills, and paper in the In-Colors! In-Colors will retire in June, 2008. So get the while you can!
Subscribe to:
Posts (Atom)